Batching
Overview
The main Batching form shows a grid of examination report KPIs (arrow 1 of screenshot below). The grid has a column for each report type where Batching is incomplete. The grid then shows a row for 'Exams not Batched' and a row for 'Exams Missing NR ID'.
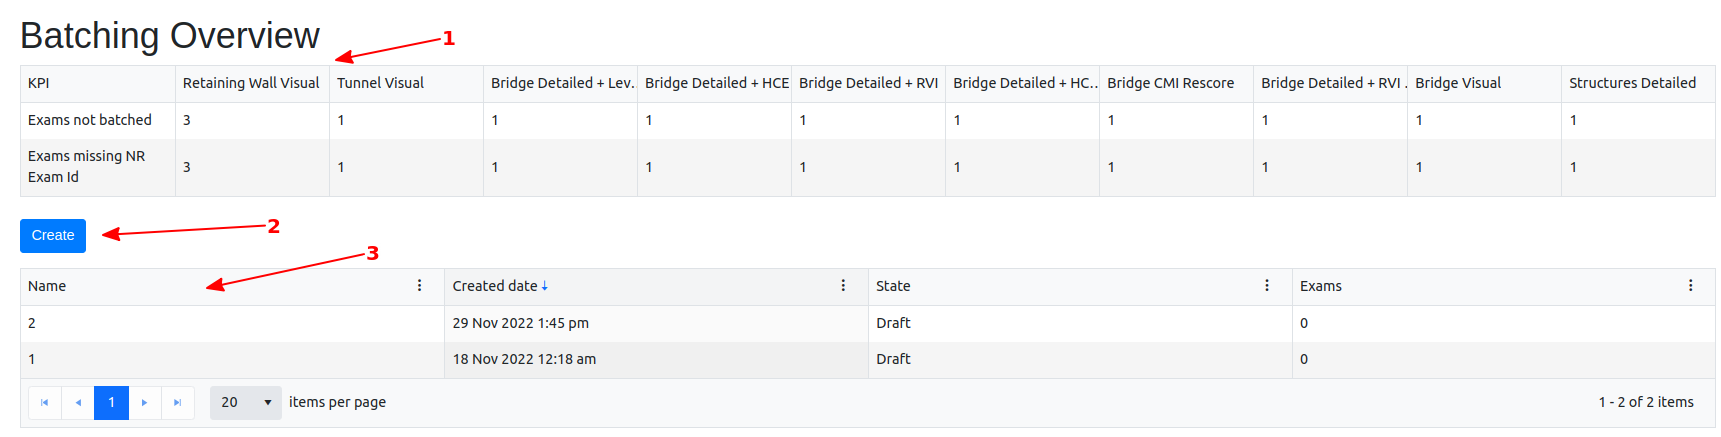
The main form also has a 'Create' button (arrow 2). The user can use this to Create a new Batch (see Create section below). Underneath the Create button, there is another grid (arrow 3) which shows 'Draft' (incomplete Batches).
Create
When you enter the 'Create Form', a new auto-generated Batch ID will be created (see arrow 1). To work with the Batch, you will have to add Examination reports to it. To do this, click the 'Add' button (see arrow 2 in screenshot below). From here you will be able to add any exams ready to be batched, if there are any. Select them into the Batch by clicking the 'Add' button. When you manually create a new Batch like this, you will enter it into the NR system and once that is done, you can 'Download' the NR batch (if it failed) or if it succeeds, you should then click the 'Manually Submitted' button (arrow 3). You can see these same instructions under the 'Batch Failure' section because creating new Batches or dealing with failed Batches are both normally Manual processes.

Automatic Batch process
When an Engineer approves an examination report, the report will be automatically Batched with a unique new auto-generated Batch Id. The Batch is queued to be processed by the Network Rail NR and CARRS systems. The Batch processing status can be viewed in this Batching form.
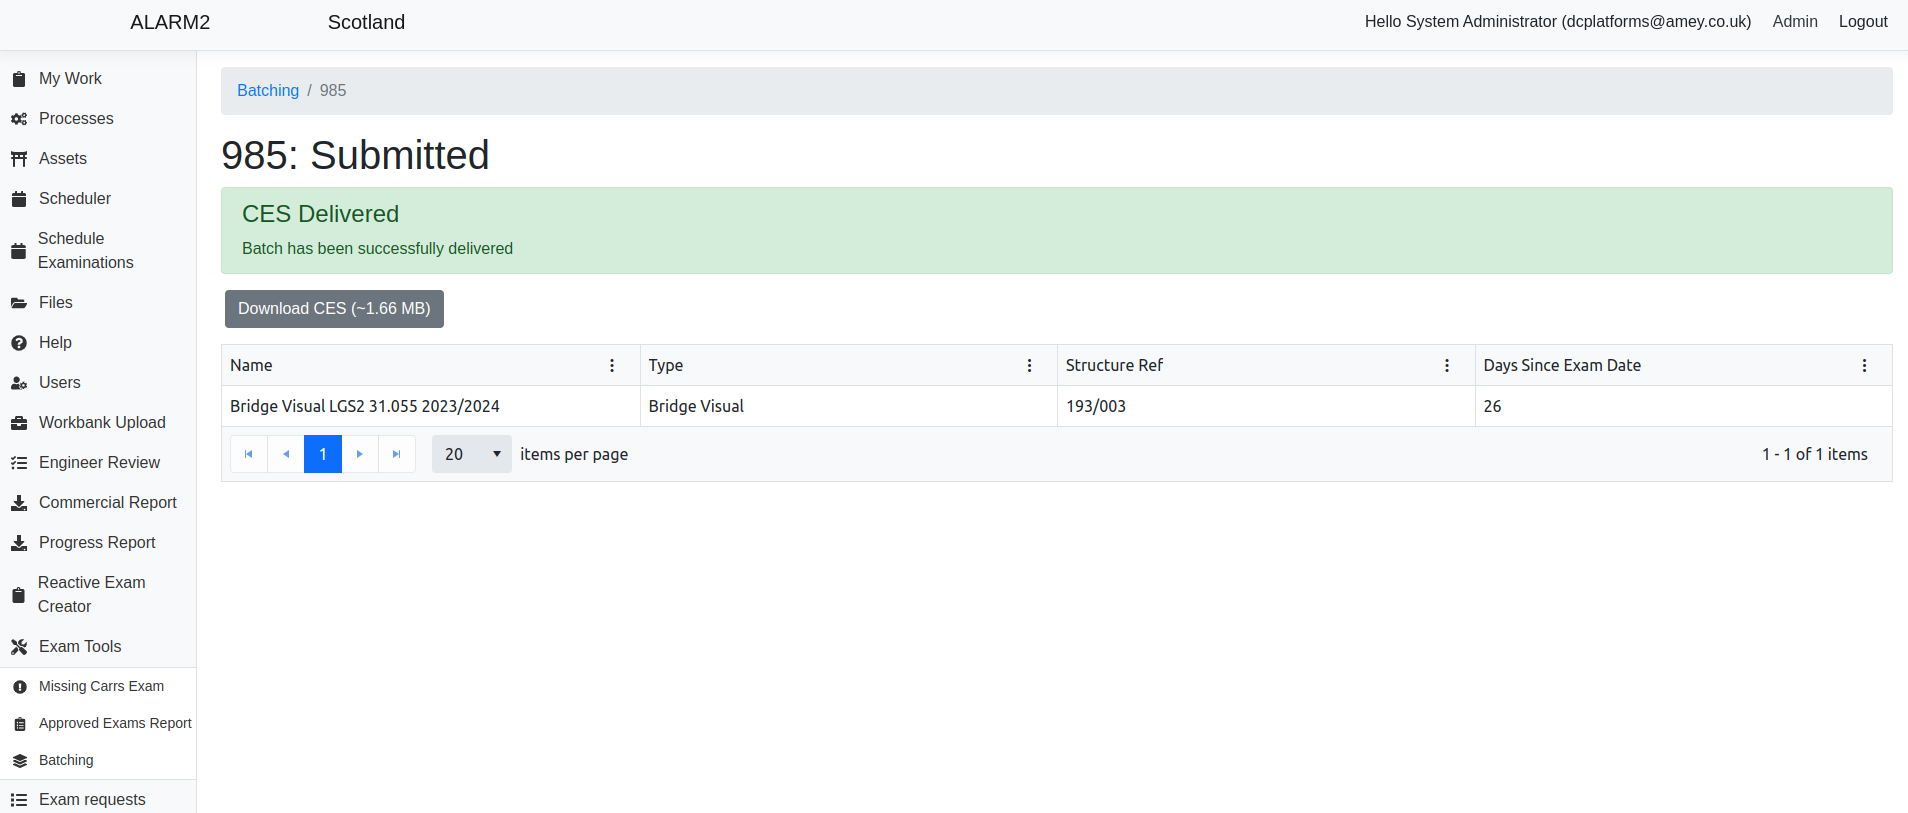
Normally, the Batch will go through NR processing without issue and you will see a positive affirmation for the Batch (see screenshot below)
Sometimes, the Network Rail NR system will fail to successfully process the Batch. When this happens, you will see an error box and explanation (See screenshot below)
Batch Failure
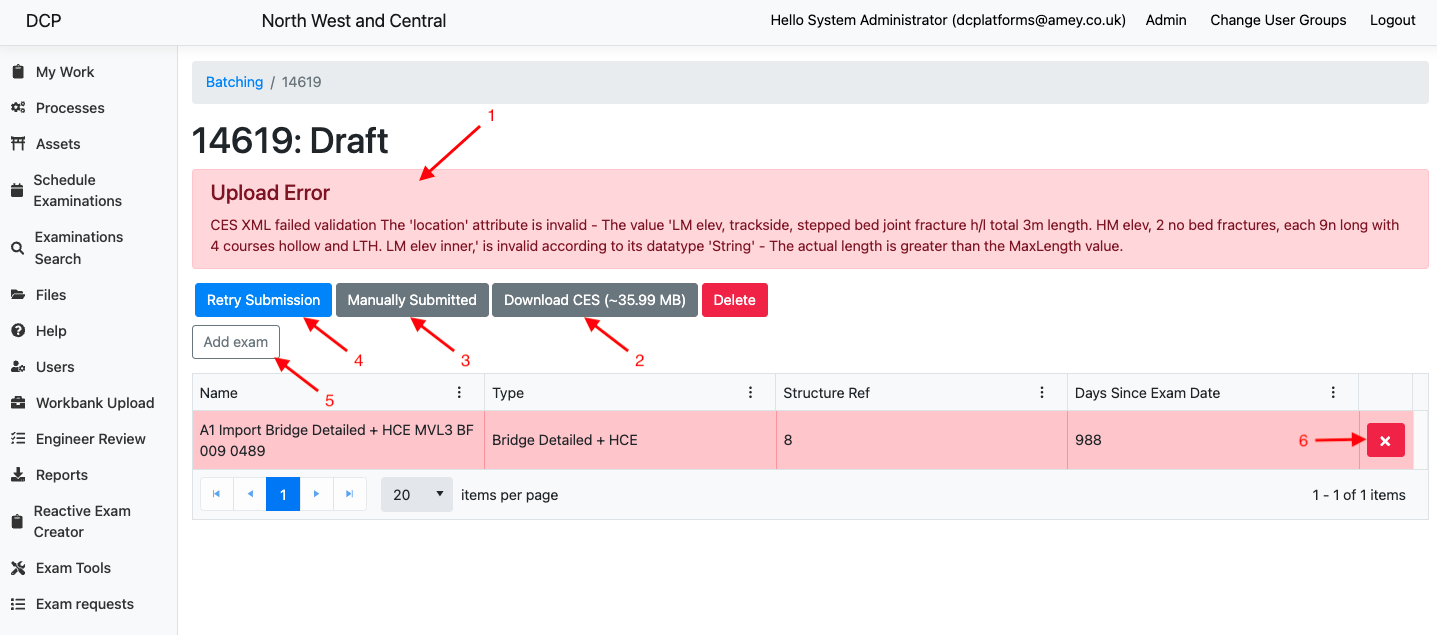
A failed Batch will be labelled as 'Draft' and errors will be displayed in the red warning box (arrow one).
At this point, if the user can adjust aspects of the Batch which have caused the failure, they have the option to download the Batch with the 'Download NR' button (arrow 2). The download will contain the pdf(s) and XML file for the Batch. After adjustments have been made to the Batch contents, the user can manually submit the Batch to the NR system. Once they have done that, they can click the 'Manually Submitted' button (arrow 3).
Alternatively, the existing unmodified Batch can be resubmitted to NR by clicking the 'Retry Submission' button (arrow 4).
Users can manually add more examination reports to a 'Draft' Batch with the 'Add' button (arrow 4). This method will use the same process as the 'Create' section above. Below the buttons a grid shows the list of exam reports in the Batch. At the end of the row for each report, there is a red cross symbol (arrow 5). If the user wants to remove report(s) from the Batch, they can click this button. A report removed from a Batch will appear in the 'Approved Exams Report' form and you can see the separate documentation for those exam reports.
If a Batch has failed NR or has been manually created with the Create feature (see Create section above), if it successfully goes to NR, the user should then click the 'Manually Submitted' button. Note that this does not need to be done if 'Retry Submission' is used and the re-submission is successful.
Note
When preparing a Batch for manual submission, the user has the option of adding more examination reports to the Batch. They do this by clicking the 'Add Exam' button (arrow 5 of the screenshot). They can also remove exam reports from the Batch by clicking the red cross at the end of the exam row in the grid for the batch. Removed reports will leave the Batch but will still appear in the 'Approved Exams Report' form.